Sunday, May 4, 2025

Upcycle

Nozzle: 0.4mm
Layer Height: 0.20mm Standard pre-set
Material: Bambu Matt PLA
Supports: Auto Tree with outer Brim

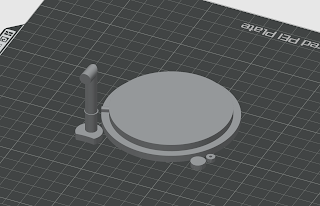
As I've printed out more bits I've also collected more of the cardboard centres that the filament comes in so I decided to expand my earlier design for storage tanks. In order to allow me to stack two (or more) tubes together to make taller towers I designed an adapter to allow them to stack up. I also stretched out the original pipe I designed to reach the second level.


Whilst I was doing this I also modified a free ladder model I'd found to reach the top of the two different heights I now have. This will give access to the towers for anyone not worried by falling off.


There will be a limit to how many of these I really need so I'll have to think up something else they can be converted into.


Monday, April 14, 2025

Bat out of Hell

Nozzle: 0.4mm
Layer Height: 0.08mm High Quality pre-set
Material: Bambu Matt PLA
Supports: Auto Tree with outer Brim


This months Mantic Vault had the Matsudan Grav biker model which previously had only been available in resin. I already had one but really needed a couple more for a proper squad to deploy in Firefight. So I cranked up Fusion 360 and imported all the parts in so they could be joined into one model before sending over to the printer.


In the end I popped the heads off so they could be replaced with spare ones from the infantry kit I had left over. Again the A1 has done a great job considering these are really made to be printed off on a resin printer. I did keep the model orientation upright even though it meant lots of support's on the bottom as it also meant all the marks from removing the supports are on the bottom out of sight.


Whilst I was painting up the bikes I also took the chance to paint up the Matsudan Medic Bots that I'd had printed up in resin a while back. I printed off some barrels and boxes to mount the models on as I'm not a fan of flying stands.


Sunday, March 30, 2025

Into the desert

It's been a productive week on the 3d printing front with some designing of my own items mixed in with printing offerings from other people. Everything has been printed on these settings apart from the mini-dunes which used a 0.12 layer height.

Nozzle: 0.4mm
Layer Height: 0.20mm Standard pre-set
Material: Bambu Matt PLA
Supports: Auto Tree with outer Brim except buildings which had inner brim.


As we play more V for Victory I've been trying to work out the correct amount of terrain for the game and it became obvious that we really needed something to fill in the slot for low/soft cover that a hedge provides. A search around on the internet came up with a set of files that looked about right. I did need to resize the dunes down to something that looked more like minor drifts of sand rather than towering dunes but that was the work of a few moments in Bambu Lab Studio. I didn't have the ready for the last game we played but they are now ready for the next one.


Continuing with the VfV theme I also knocked up a card & token holder to go by the side of the table, this will save having piles of tokens next to the table. I used the negative space technique from the last blog to make this but having now made some progress with Fusion and the Inset function I would do it differently if it had to be done again.


With the new Halo: Flashpoint bundles on the way I also picked up a card tidier design to keep all the cards and tokens in one place. Mantic Games are selling a version of this but it's much cheaper to get a free design and print it off myself.


Lastly for this week I picked up Fusion 360 again and watched a tutorial in order to start making some progress on designing some buildings. I'm basing these around a 3" cube system so I can use the Deadzone rules as the basis for an infantry skirmish game. I had planned to dive straight into Stalingrad but will be making a diversion via Tobruk (with any luck). I want to create some template designs which can then be modified into individual buildings so after watching a video on the basics of Fusion 360 I was able to create a box and lid. This is a 3" * 6" and I will make up a 3*3 and 6*6 template as well before I start the detailing.


I found some reference photos of Tobruk on the Australian War Memorial site which looks like a real treasure trove of information for any conflict the Australian Army took part in.


Here's a cut down version of the design I printed out to check the parts all fit, there is some warping on the corners which I need to look into. Initial investigations suggest adding a Brim around the print will stop that.


Sunday, March 23, 2025

Merging and Negative Space

Having been off for the last week that has meant the printer has been working over time to add things onto my 'to be painted' pile. 

I decided to print up some terrain to use in HALO and Deadzone and wanted to modify the set I'd already printed off for Stu.


First of all I looked at the roofs to add a hole in for ladders to be attached on the inside of the building. This was very simply achieved by add a 30mm negative space cube to the roof model, a bit more tricky was adding the mounting point and I had to get my ruler out to measure the correct size and then work out the placement relative to the hole. Much to my surprise I got the dimension correct on the first try (even though I forgot to measure how wide the ladder was) and I printed a couple off.


I used the same technique to open some closed doors up and add windows to enclosed buildings.


I then realised that you could add a 'positive' cube and put a negative on inside to create a window sill / enclosure, making them look a bit more interesting.


The last thing I modified where the barriers for the roof tops by merging them together into L shapes for ground scatter. I now realise I could have gone a step further and used the Mesh Boolean 'Union' option to join all the individual items into one object, though this often throws up errors that cannot always be resolved in Bambu Lab studio


I've also knocked up something totally from scratch to use the cardboard spools that the filament comes wrapped around. I've got a few of these now so wanted something to use them up and hit on the idea of a simple kit that could be added to the spool to male an oil tank.


It's not very complicated but does the job and looks good enough with some paint on.


Everything here has been printed with:

Nozzle: 0.4mm
Layer Height: 0.20mm Standard pre-set
Material: Bambu Matt PLA
Supports: Auto Tree with outer Brim except buildings which had inner brim.


Sunday, March 2, 2025

Build a better Boat

Last week I came back from the South Oxford Armada event feeling enthused about all things Armada, and not just because I managed to snag first place somehow. Armada is a great game and painting up a fleet isn't that massive an undertaking when compared to many of the other games we play.


It got me thinking about playing a new fleet and I wanted something that would fit the look of my Kingdoms of Men. The obvious choice would be the KoM fleet that Mantic do but the models didn't really fit and the rules aren't the most interesting so after some looking around I settled on Northern Alliance / Varungur. 
I downloaded the files and a base pack and loaded them into the Bambu Lab software and it struck me that I could probably print most of the parts as a single object rather than fiddling around with tiny pieces.


A quick bit of research soon revealed how it is to merge objects in the Bambu Lab software. Essentially you select two objects and then choose to Merge, you then move one piece onto the other making sure they actually touch and the software does the rest for you. You end up with something like this below, which is the Northern Alliance Draakar.


I used the following settings for the prints and let the software sort the rest out:

Nozzle: 0.4mm
Layer Height: 0.12mm Fine pre-set
Material: Bambu Matt PLA
Supports: Auto Tree with outer Brim


These are the first two prints I did and have undercoated, I wanted to see if the layer lines where obvious and they really aren't. I could have gone down to the 0.08mm layer height for even greater fidelity but I don't think that's really required in this case. On these first two prints I'd left the base depth at 2mm but it did seem a bit thin so I've increased that to 3mm for the others and I suspect I will use these as test subjects for the paint scheme and go back and print a couple more with the new thicker bases.


So since the first couple of successful prints I've also printed out an Icebreaker this morning.


A pair of the large Serpent models where printed yesterday. I've left the rear sail and mast as a separate piece to aid the painting process but it could just have easily been attached to the hull as well.


One failure I have had is the Snekkja, I'd not set the mast properly into the base of the ship so it snapped off as I tried to remove the supports. I will go back and sort that out and then can print it out again.


Sunday, February 16, 2025

Going Big

This week the printer has been going big with some larger prints being produced.

First up was a Abyssal Dwarf Hellfane for Mr T. This is very much a centre piece model for the army which also buffs the infantry.


It's a big old beast and the files came as quite a few separate parts so it was a real relief to get to the end and find that I needed barely any trimming to get all the bits to fit.


The Mantic Vault files do include three crew to ride atop the beast which I've sub-contracted out to the Cirencester arm of the printing empire as they have a resin printer. I can't wait to see how Mr T paints this chap up, though I suspect it's going to take a while.


Next on the large print queue was a larger Stuka, the one I'd printed before didn't really look the right scale against other vehicles. These will just be 0200 Hours objectives to be blown up so they don't need to be super detailed. One bonus was that each is a single piece, so no gluing was required.


I've also completed the painting on the sand-bag emplacements I printed off to match the resin ones I already had. A close up picture shows you can see a bit of layering on the PLA print but once you step back a bit it's really hard to tell them apart. Had I go with the smaller 0.20mm nozzle I expect the difference would have been even smaller.


And last of all I printed off a Kaijudan for Deadzone. The proper model is much smaller than this so I had to blow him up, but it worked out rather well. I just need to sort out a base and slap some paint on now and he can start terrorising cities!